Share External CSV Data
MesoSim allows users to use external data to enrich backtests.
This is done using web based, published CSV format. The CSV file columns will be available as variables in the backtest throughout the execution.
You can publish a CSV file via GitHub Gist or Google Sheets.
Both services require free registration.
We recommend using GitHub Gist as it’s easier, faster, and more convenient to use.
Before we show the steps of the import, let’s first focus on the format requirements that apply to all files to be imported.
Requirements
Here are a few key format requirements. We keep a complete list of requirements in the relevant section of the Job Definition Reference.
- The CSV file must have a header row with the names of the columns/variables.
- The first column must be named "date "or “datetime” (not case sensitive) and can only contain date or date-time values.
- The CSV file must be publicly accessible either via Github Gist or Google Sheets's "Publish to the web" feature.
Publishing with Github Gist
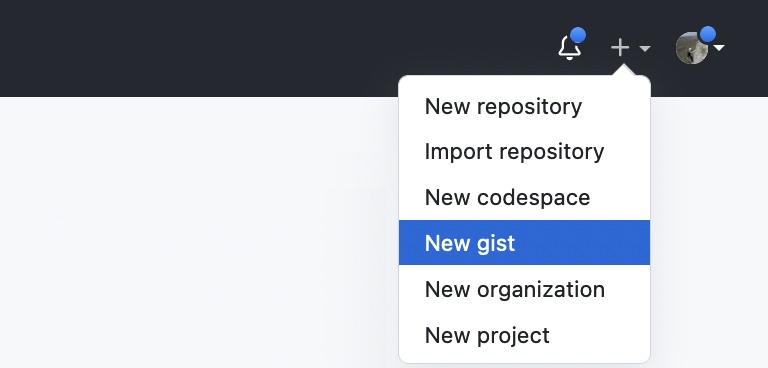
After logging into your GitHub account go to New Gist.
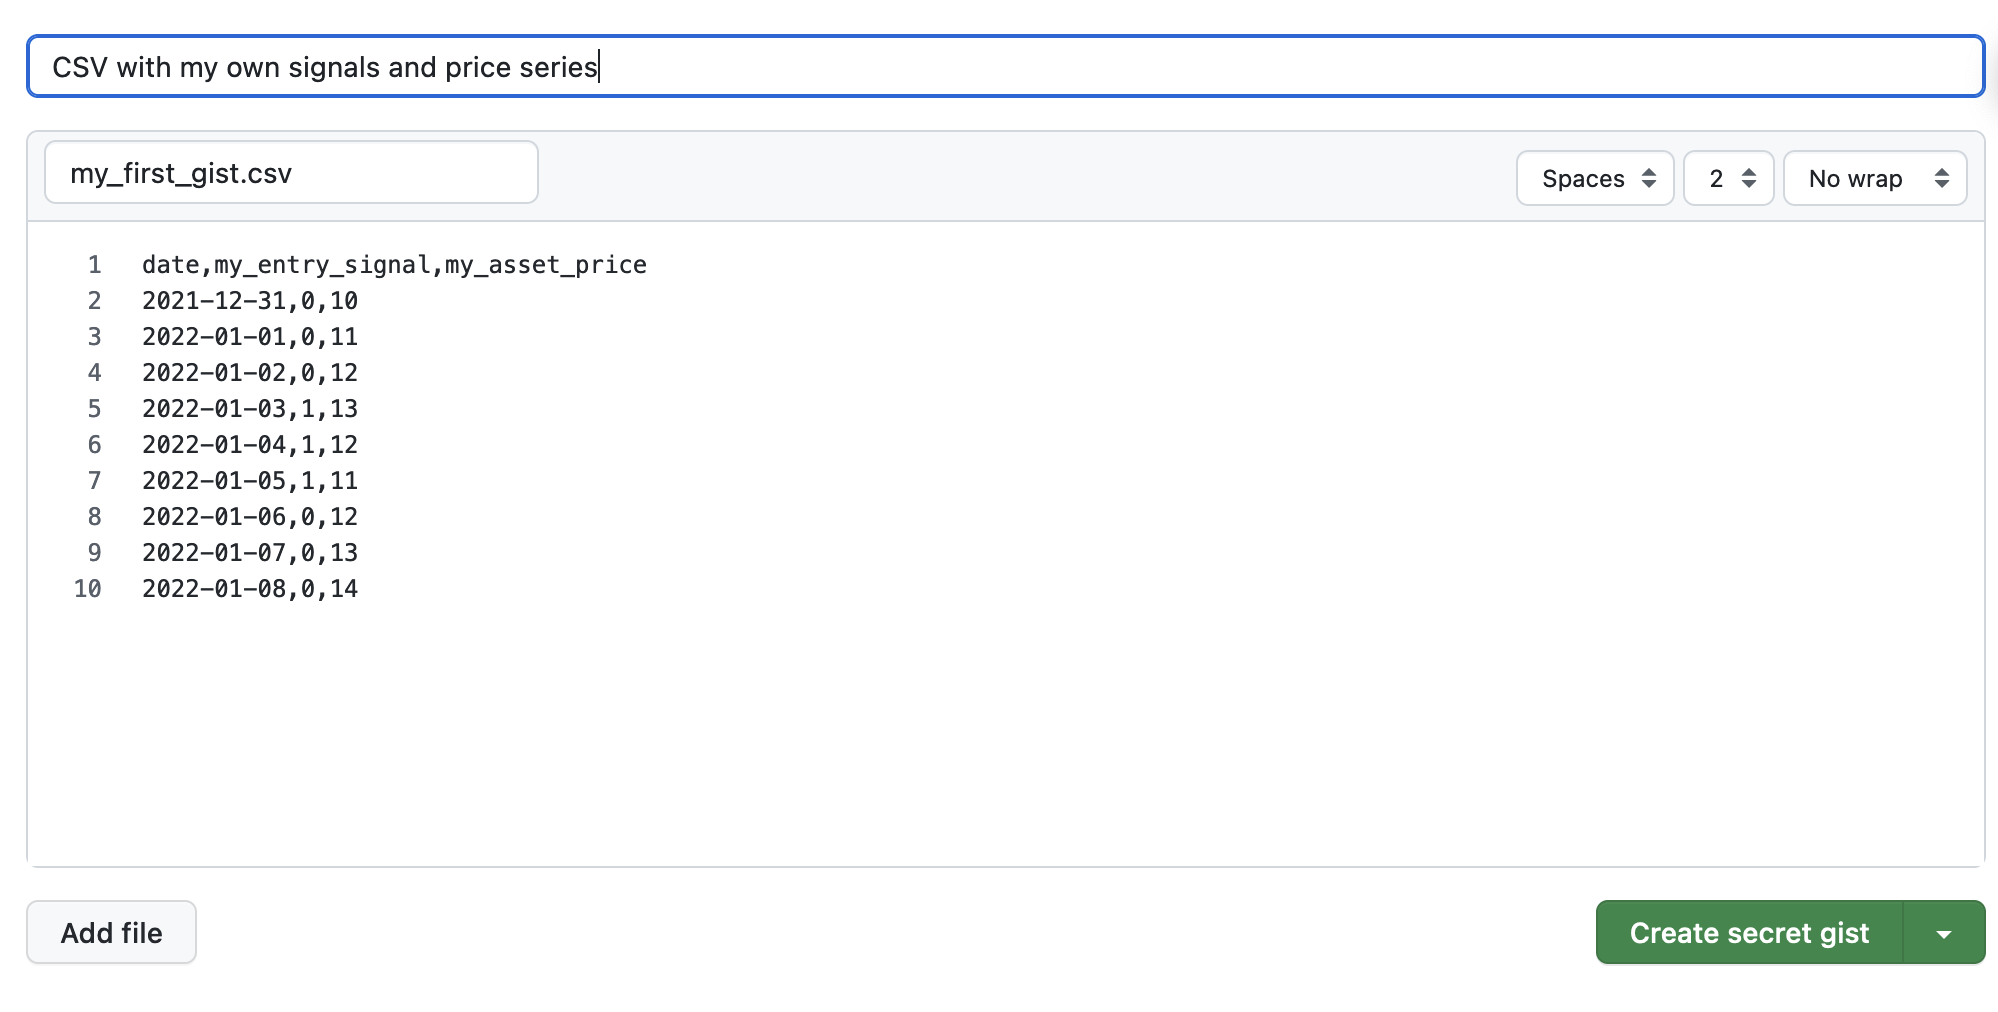
Paste the content of your CSV to the window. If you leave the filename empty, the tool will generate one. You can create a secret or a public gist; both will work.
Instead of the default “Embed” select “Share” to get a shareable link. Copy it.
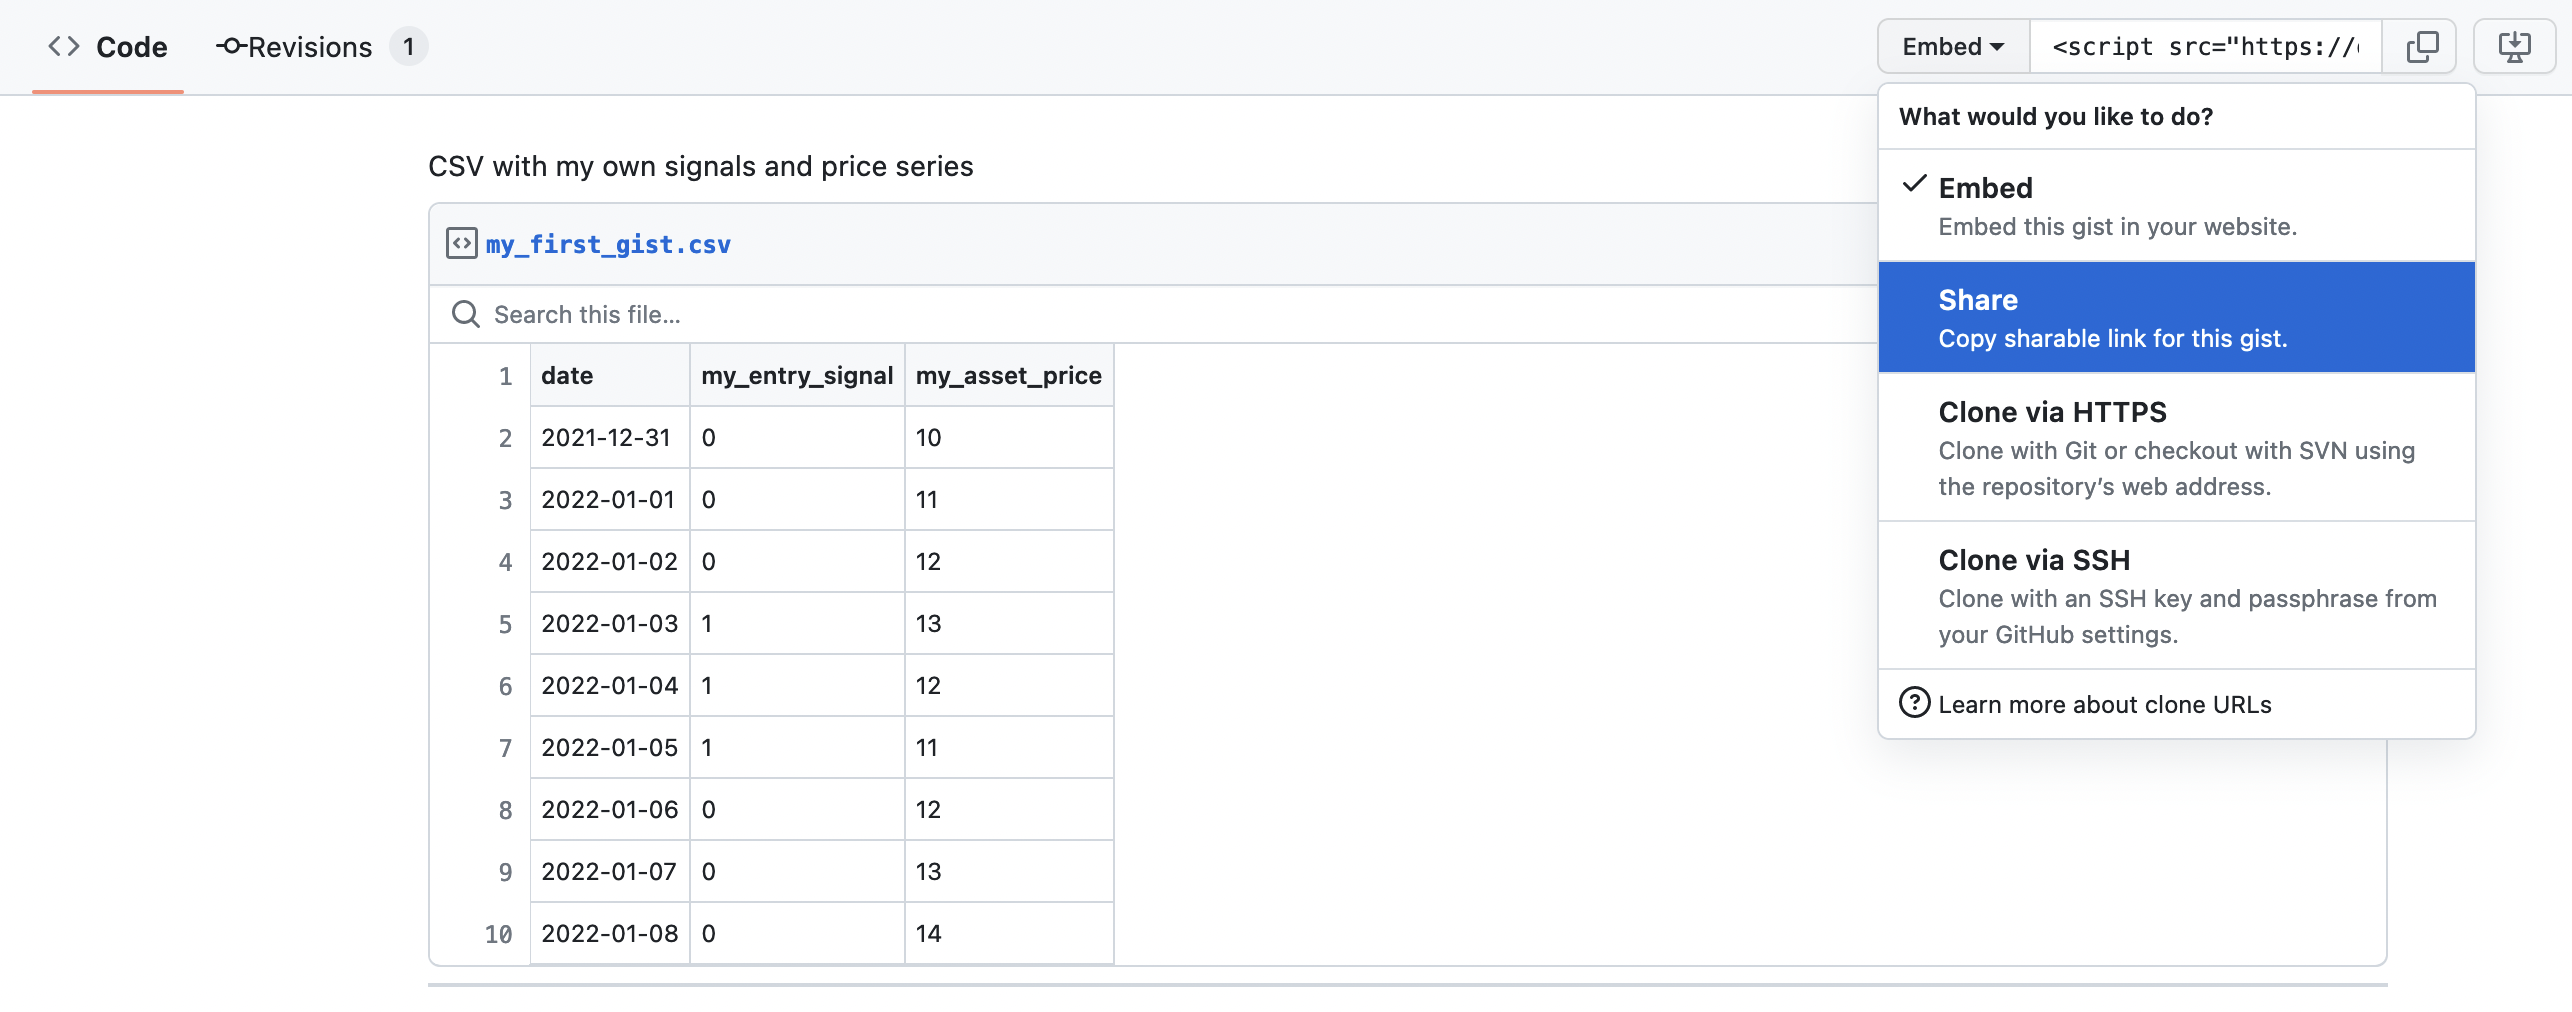
Copy the link and validate that it’s downloading correctly.
Alternatively, you can click the 'Raw' button, which will bring you to an URL that you can view in your browser and use in the run.
Publishing with Google Sheets
Alternatively, you can use Google Sheets. It is recommended though to use Gist.
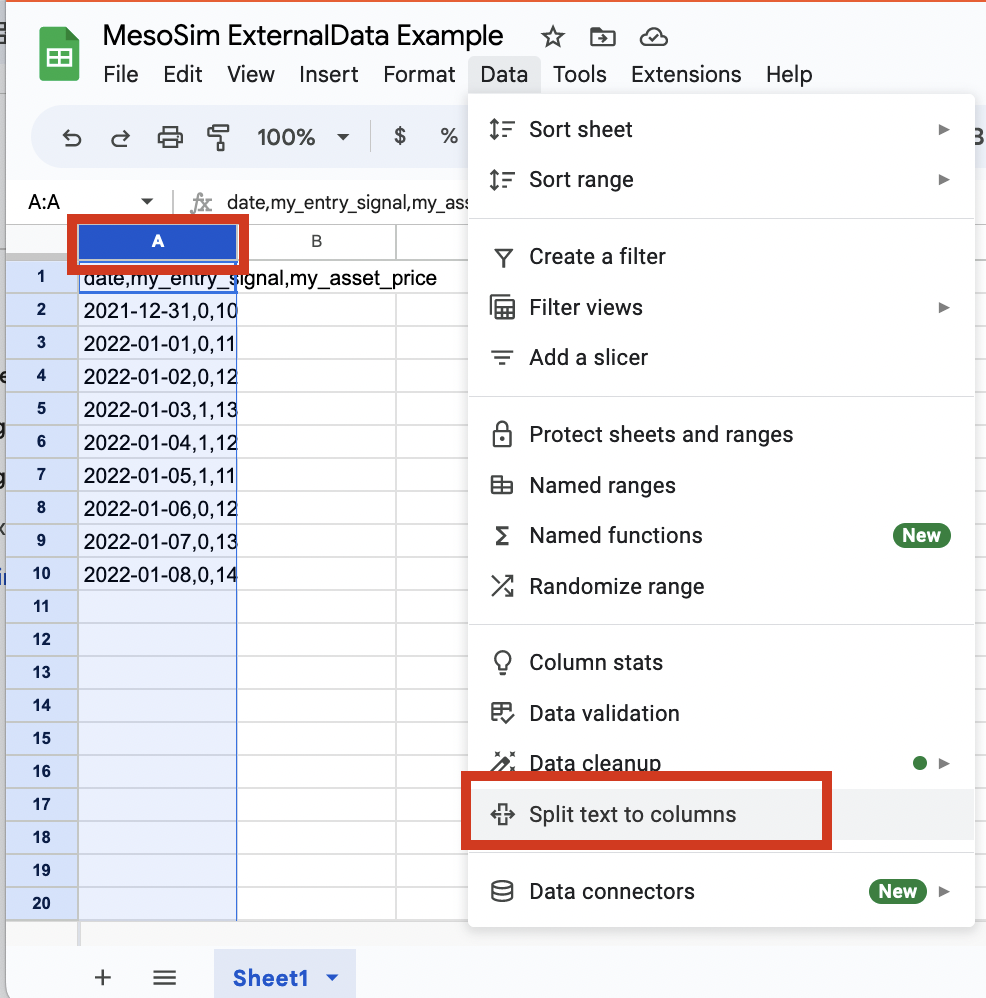
If you decide to use Google Sheets, the first step is to split the CSV into columns.
Then, you need to publish the file in CSV format and use the resulting URL in the backtest.
Split text to columns
This step is non-optional for the correct reading of the data.
If you missed this step, you’d get the following error message when using it:ExternalData.CsvUrl: First column should be named "Date" or "DateTime", but is named "......"
This feature can be accessed in Google Sheets in two ways.
1) Right after pasting the data a Folder icon appears; open it and select “Split text to columns”
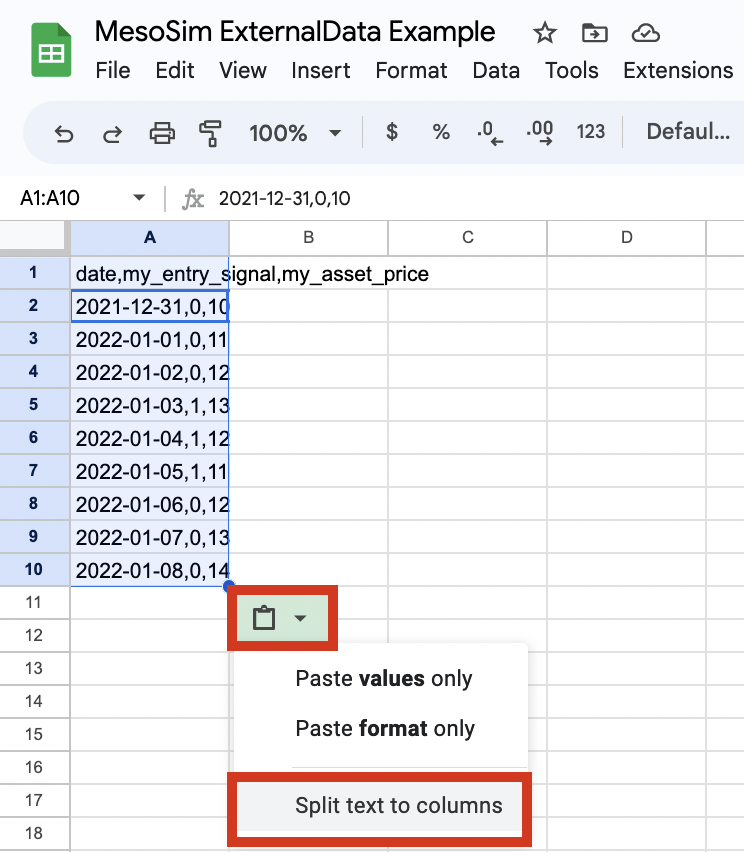
2) If you missed splitting the text right after importing, you can still do it by selecting column A, then go to Data - Split text to columns.
Validation
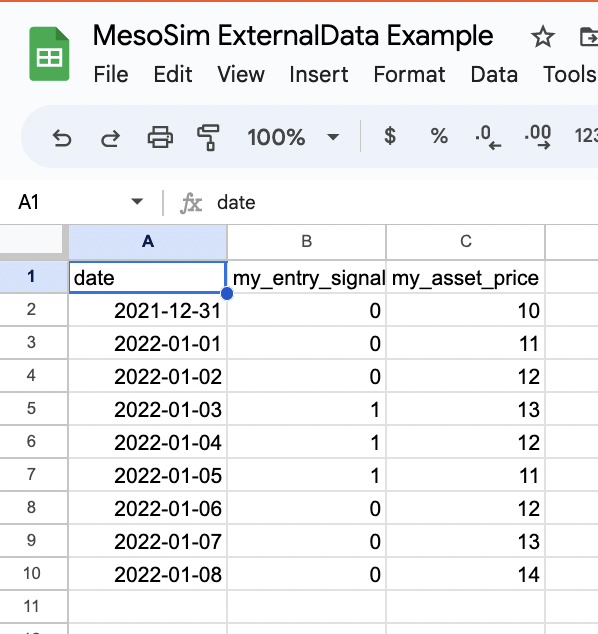
A correctly formatted file is split into columns looks as follows:
Publishing
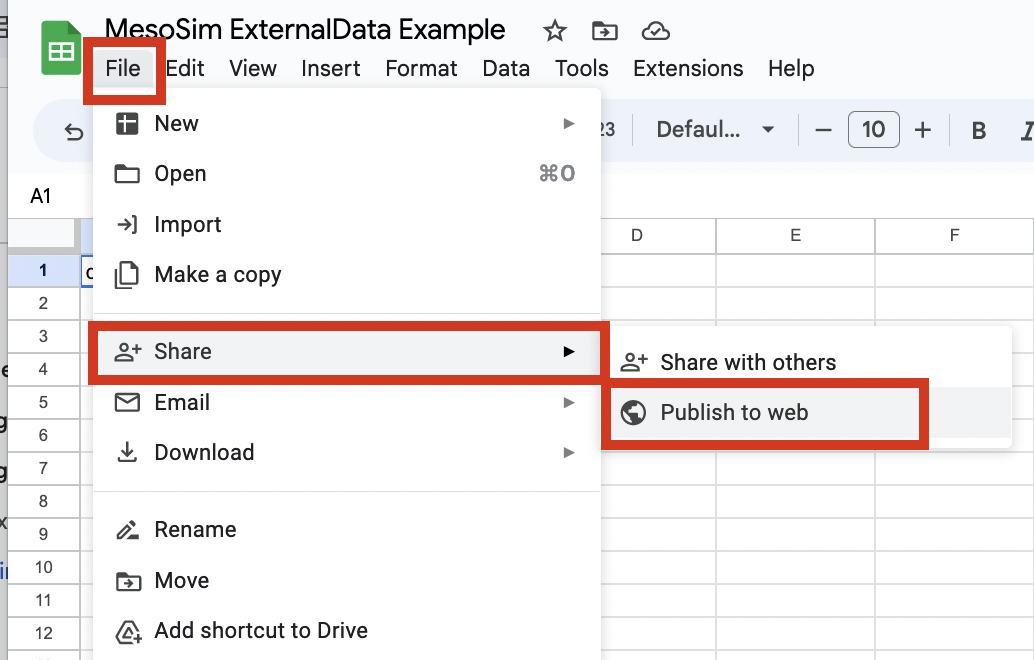
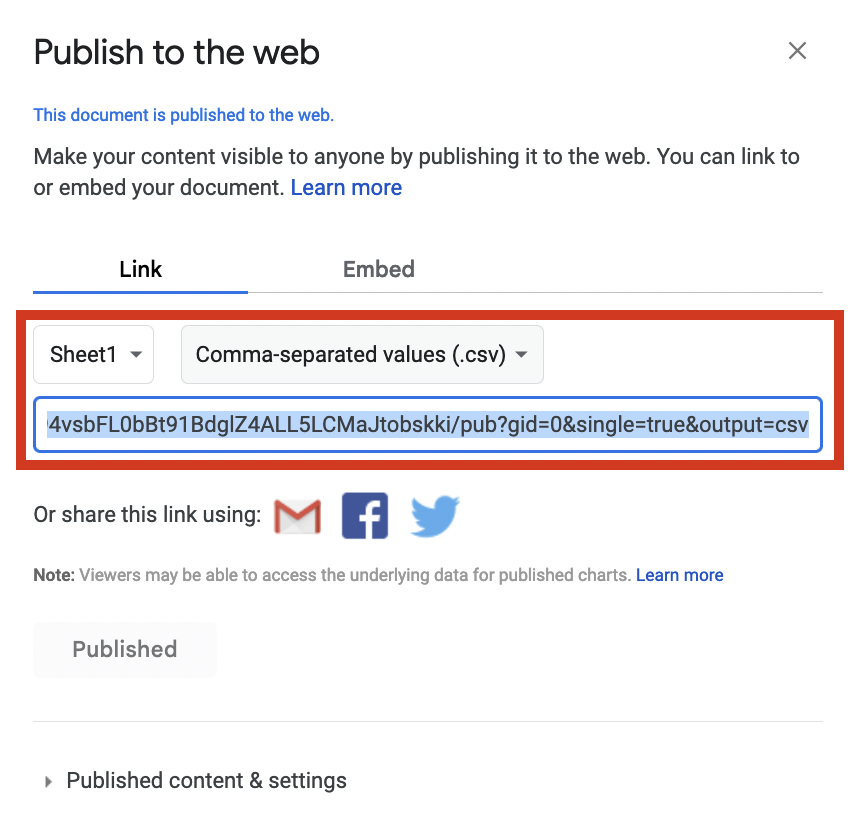
Now that you have the correct file format, you can publish the data. Go to File - Share - Publish to web.
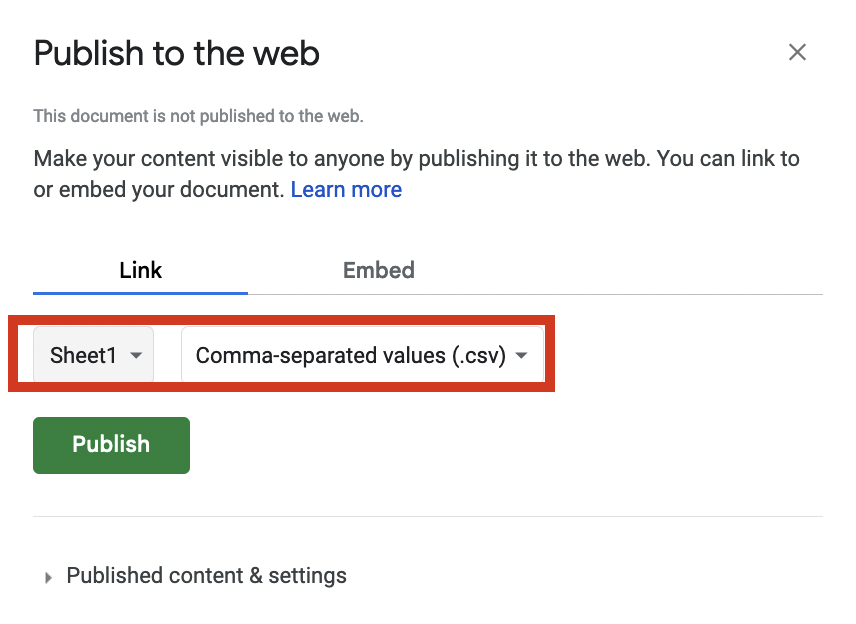
Select Sheet1 (instead of Entire Document) and Comma-separated values. Hit publish.
Copy the link underneath and validate whether it’s downloading correctly.
Paste the link into your browser’s address bar and verify that the csv file is downloading as expected.
Further read
Please refer to the Use External CSV Data article and Job Definition Reference's Respective Section on how to use the data.
